So, you want to crank out some of those highly impressive one arm pull ups or chin ups? You may have tried negative ones and extensively trained regular pull ups, even with weights. But still, it seems impossible. Well, there are some tricks to finally learn it. Knowing the right one arm pull up and chin up progression is one of them.
One arm pull ups and chin ups are the ultimate demonstration of physical strength and mental power. They are not only highly impressive, but also bring your performance in any climbing, calisthenics, or Ninja Warrior on a whole new level. Only a few people accomplish that feat in their life. But if you want it badly enough and work smart, you will be one of them!
On the following pages, you will see how you can learn the one arm pull up and chin up within a few months or even weeks, once you can do more than 15 clean pull ups. It’s the exact method I used to achieve it. And now you will!
One arm pull up or chin up?
Let’s get technical first. A pull up is done with an overhand grip, meaning your palms are facing away from you, while a chin up uses an underhand grip.
Some people may find chin ups easier, as they put their biceps in a stronger line of pull. Others with better trained back may prefer pull ups. It’s best to train both for a well-balanced pulling strength.
There are only minor differences between the one arm pull up (OAP) and the one arm chin up (OAC). It’s basically the grip and which shoulder is leading, but more about that later. So, whenever I’m using “pull up” or “OAP”, it’s interchangeable with “chin up” and “OAC”, if not otherwise stated.
In some of the exercises, you will see me doing a chin up variant instead of a pull up. However, progression and requirements are the same. Just change the grip for training the one arm pull up.
Factors that influence how long it will take
Whether you will need months or only a few weeks to achieve the one arm pull up, depends on the following factors:
Upper-body strength
Your current upper-body strength is the most critical aspect. If you can already do more than 15 full-range pull ups, you will be much faster than someone who has to start from scratch.
Body type
The one arm pull up is typically easier for those with a less bulky physique and light legs.
Body fat
Lighter people with less body fat will have it also much easier. A single pound can make a huge difference. If you’ve ever trained with a weighted vest, you know that.
What you need before training the one arm pull up
The one arm pull up is an advanced move that requires great strength and is stressful for your joints and tendons. You will learn it much faster and with less risk of injury when you have a solid foundation to build on. Here is what you need:
Well-developed pull up strength
Make sure you can complete the following two-arm pull up progression before engaging the one arm pull up:
# | Exercise | Reps |
1. | Dead Hang Pull Ups (wide & close grip) | 15+ |
2. | Scapular Shrugs | 15+ |
3. | Pull Ups with short holds at certain positions (0°/90°/180°) for 1-2 seconds | 10+ |
4. | Ultra-Slow Pull Up with 60-120 seconds duration | 1 |
Dead hang pull ups are clean pull ups where you go as low as possible and straighten your arms while keeping your shoulder blades retracted. Always try to do them as clean as possible, as the lower pull up part is one of the sticking points of the one arm pull ups.
A scapular shrug, as shown in the video below, is what supports the initial movement of a clean pull up without having to rely on momentum or kipping. By depressing the shoulder blades down and retracting them toward your spine you elevate your body the first few inches. This exercise is crucial if you want to master the one arm pull up.
If you notice that you must improve your regular pull up game first, follow my article about pull up training and then come back.
Excellent grip, core, and scapular strength
Besides being able to perform the two-arm pull up progression you should be strong enough to complete the following tasks:
- 20+ seconds One Arm Dead Hang
- 10+ seconds Two-Handed Hanging L-Sit
- 3+ One Arm Scapular Shrugs
Grip strength
Hanging from one arm can be hard in the beginning. Practice one arm dead hangs after your regular workouts, until you can hang with each arm for at least 20 seconds without twisting around. This strength will help you to remain stable during OAPs and not losing grip. Check out my grip strength exercises, if you want to increase your grip strength and have some variety.
Core strength
A well-trained core will also aid stability when hanging from a single arm. Train it, if you notice you need more control. I will cover a special core training on the pull up bar in a future article. Make sure to subscribe to the newsletter to not miss that one.
Scapular strength
The one arm scapular shrug is another fundamental skill. If you can’t do it, you will have a hard time achieving a clean one arm pull up without jumping. If the one arm scapular shrug is too difficult in the beginning, make it assisted and use a support such as a rubber band, a towel, or even the doorframe, until you are strong enough.
Once you fulfill all the requirements above, you are ready to start with the one arm pull up progression. So, let’s jump right into it!

The one arm pull up progression
The following one arm pull up progression goes from hard to easy. Always start with the hardest exercise you can do, even if it’s only one repetition. Perform that exercise until muscle failure and then go on with the next easier one. That way, you will see much faster gains, than starting easy and having already exhausted muscles when it comes to the more difficult exercises.
You can do the same progression if you want to learn the one arm chin up. Just change the grip and bring the shoulder you are hanging from to the bar, instead, when doing one arm chin ups. In case of one arm pull ups you lead with your opposite shoulder, not the used one. That’s the only difference.
Warm up properly
The one arm pull up is an advanced feat. So, warm up very well! A few regular pull ups and hanging shrugs in advance are great. Also do some dynamic stretching of your shoulders, elbows, and arms.
Don’t overdo your training
Train one arm pull ups only twice a week, as they are very stressful and can lead to serious injuries otherwise. Elbow tendonitis is the most common one. It’s nothing you want to risk. If you ever feel pain, stop immediately and let it heal! Otherwise, it may take months if not years until you can train again without pain. Better safe than sorry.
Overview of the exercises (from hard to easy)
Here is an overview of the exercises I used to learn the one arm pull up, beginning with the hardest ones. The latter ones are getting gradually easier. You will see all of them in the video below plus two more to finish that workout.
For effective strength training, you must be fully recovered between each set. Rest for at least 2-3 minutes between them.
You can do all these exercises with a pull up bar. However, gymnastic rings are way better as archer and typewriter pull ups feel more natural with them and you can rotate your wrists and shoulder freely. If you want to know which ones I’m using, check out my training equipment.
How to perform each exercise
Let’s have a closer look at every single exercise, its proper form, and how you should vary them over time to increase their training stimulus. Once you feel that these exercises become easy, you are ready to try your first full-range one arm pull up!
Exercise 1: One Arm Lock Offs at highest position for at least 5 seconds
Holding at the highest position, also called a flex hang, develops the strength for the last part of the one arm pull up. This exercise might be toughest for some people, for others not, as locking by itself is a skill that needs extensive training. I struggled with getting my one arm pull ups above 90 degrees flexion until I incorporated this exercise.
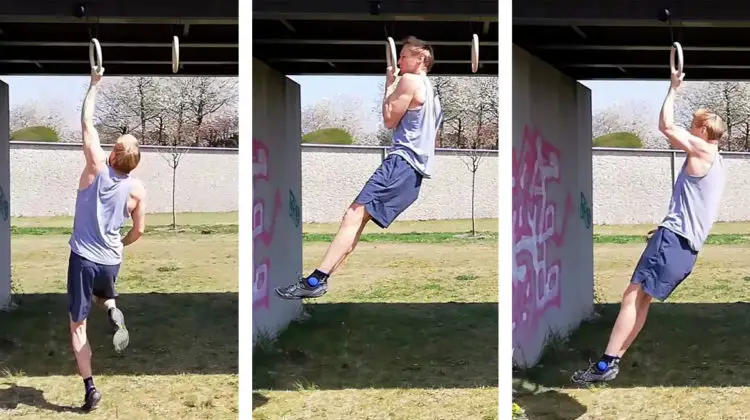
Jump up or use both arms to get to the highest position. Let go one arm and then hold it for at least 5 seconds. Increase slowly. Don’t overdo it in the beginning.
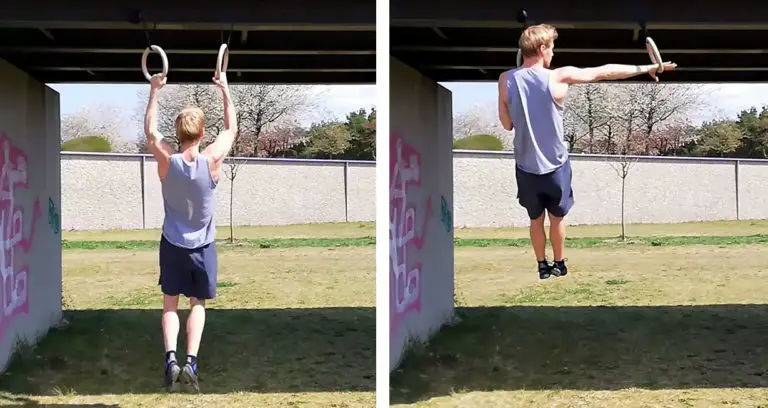
Exercise 2: Jumping One Arm Negatives with 2+ seconds to descent
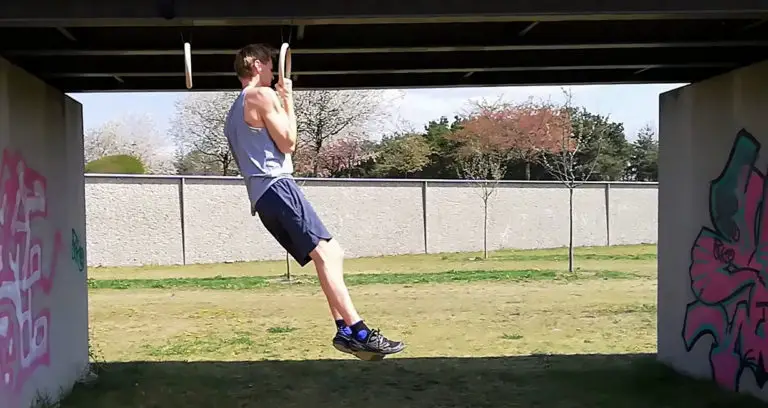
This is the closest exercise to a real one arm pull up. Jump up and try to descent as slow as possible. Over time, jump less and come down slower, until you can do a clean OAP without any jumping.
If you drop like a stone on your first try, don’t worry. Just skip that exercise and start the progression with an easier one. In a few sessions, you will be strong enough.
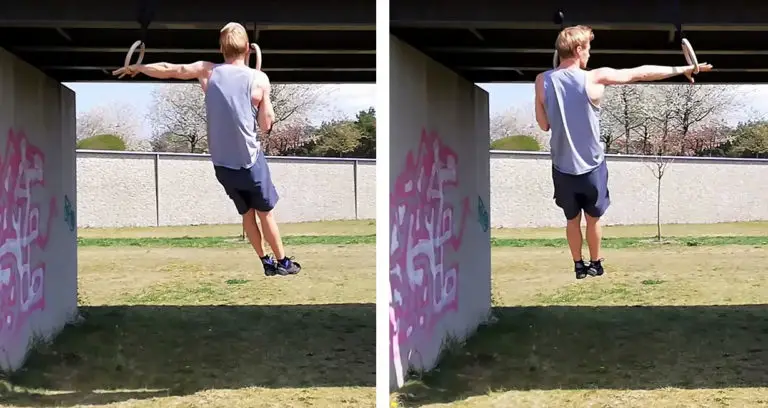
Exercise 3: Archer Pull Ups
The idea of archer pull ups is to put more and more load on a single arm while the other functions as slight support and balancing aid. Archer pull ups will mainly train the upper part of the one arm pull up, as you can initiate the movement with both arms.
When using a pull up bar place your hands a little wider apart. With rings, the distance doesn’t matter that much. Now, pull mainly with one arm and try to keep the other arm as straight as possible. Then go down and repeat that with the other arm. That’s one set.
Gymnastic rings are the optimal tool for this exercise because they can move and let your wrist rotate freely.
Exercise 4: Typewriter Pull Ups
Typewriter pull ups are similar to archer pull ups, but without going down between switching arms.
Use a wide grip. Pull your chest up to the bar and then shift your weight from one arm to the other while extending the opposite arm out. Try to use the straightened arm as little as possible.
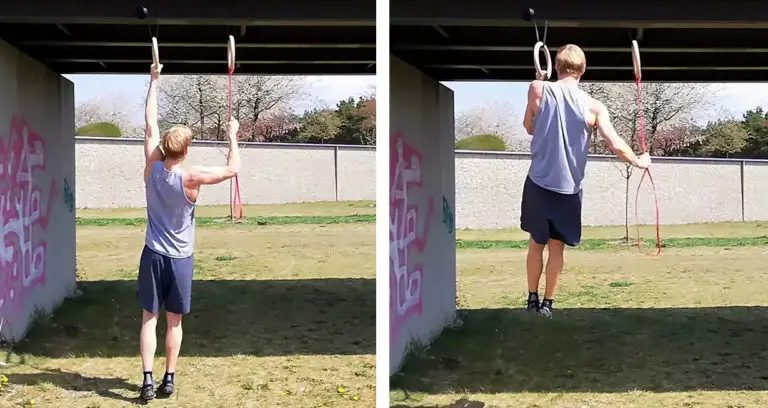
Exercise 5: Assisted One Arm Pull Ups with a resistance band
Typically you face two major challenges when training the OAP:
- Not being able to transfer from a full dead hang to elbow flexion.
- Struggling with pulling yourself further up after 90 degrees flexion.
The assisted one arm pull up is the most basic and variable exercise for a clean OAP, that helps you to overcome both challenges.
Start with a stronger resistance band with a resistance of about 30% of your body weight. Fix it at your pull up bar or the unused gymnastic ring. When starting with OAPs, grab the band with your free hand as high as possible. As soon as you can do 3 sets of 5+ reps, go further down. Once your free arm starts to do more pushing than pulling, switch to a smaller band or use fewer fingers to hold on.
Some more tips for the one arm pull up
Now that you are ready to train the one arm pull up, here are a few more tips. They will assure proper form and make your attempts easier. Follow them, whenever you train the one arm pull up:
- Keep your core and glutes tight to remain stable.
- Bring your used arm as close as possible to your body on the way up.
- Also, try to keep your body straight. This will become easier the stronger you get. In the beginning, you will certainly tuck up your legs.
- Recover well between your one arm pull up workouts! At least 2 days. You will see faster gains when you take longer breaks in between than usual.
- Keep pushing and always focus on your current weakness. Strengthen that first and the rest will come!
- Try blood flow restriction training during your regular pull up training. It will help you in increasing your strength faster.
Final words
Congratulations! You are ready to master one of the most respected bodyweight exercises. Once you can do more than 15 clean pull ups in a row, you may achieve the one arm pull up and chin up within a few months or even weeks depending on your current condition.
Stay consistent and keep pushing, but don’t focus on it exclusively. Implement the workout for the one arm pull up in your regular training schedule and follow it 1-2 times a week. Give your body enough time to recover and improvements will come! If you ever feel pain, stop immediately, and progress only after your pain is gone!
Have fun on your way towards your first one arm pull up or chin up! If you liked this post and know someone who could benefit from it, hit one of the buttons below and share it with them. I’d really appreciate that.
is this workable for female as well?
Yes, I would recommend this progression for females as well.